What’s the point of having a great logo if you never use it. It’s one thing to insert your logo on your website, social media, and advertisements, but considering how much business is done with Microsoft Word documents, why not there as well? How do you insert your logo in Microsoft Word?
In this guide, we explain how to insert your logo in MS word, step by step. You can use your logo for letterheads, signatures, or materials for printing (like flyers, posters, and calendars), but first you need to know how.
How to Prepare Your Logo for Microsoft Word
First things first, you need to prepare your logo for MS Word. Right away you want to make sure your logo file is saved in a format usable by MS Word: JPG, PNG, and GIF are common choices. Unfortunately, not all versions of MS Word support SVG files — a popular format for vector logos — but you can convert SVG files to a file format appropriate for Word.
You also want to evaluate the content of your logo. If your default logo is large or full of intricate details, it may not translate well when you shrink it. This may be a good time to update your logo design if you want something fresh and modern, but you can also design a variation logo just for smaller spaces.
Variation logos are becoming more popular lately with all the new forms of media popping up. You can have separate logos for mobile devices, desktop PCs, print ads, and giant billboards. The key is to make them all similar, but remove and add details depending on where the logo will be displayed.

How to design a logo for fre
What if you don’t have a logo or want to redesign your existing one? Some people say you can design a logo directly in MS Word using clip art, but we wouldn’t recommend that. MS Word is software built as a word processor, not a logo designer. It’s better to use a free logo maker like Logogenie, which includes all the tools and features you need to make a logo.
If you’re unsure about the particulars of logo design, browse our blog for helpful how-to guides. We have articles on using shapes, fonts, and colors to fit the brand personality you’re going for, and for inspiration we feature top ten lists of the best logos in different industries, from tech to fashion. We even have a guide on how to use our free logo maker so you can get started right away!
How to Insert Your Logo in Microsoft Word for Letterheads
Brands have a lot to gain by creating letterheads with their logos. Not only do branded letterheads look more professional, but they also help with brand awareness and recognition.
Here’s how to insert your logo into MS Word. First open the document you want to use, or create a new one. Click on the Header tab and choose the style you want — keep in mind that the style of your header can influence how people view your brand, so choose wisely.
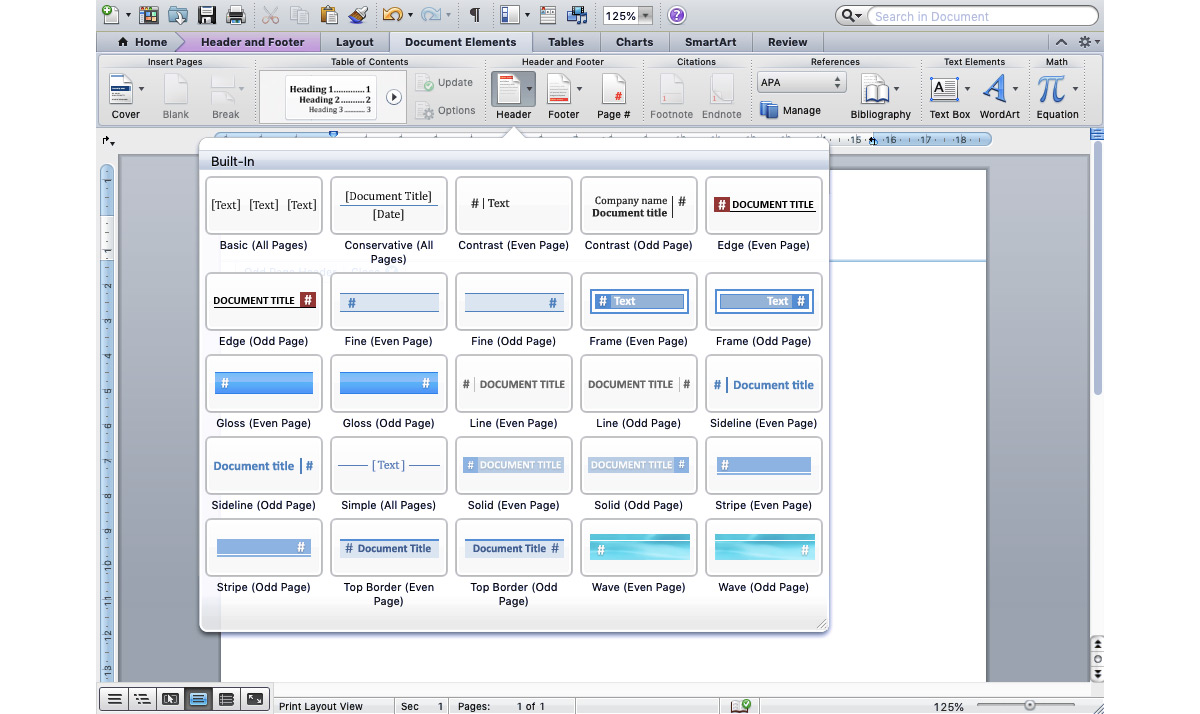
With the header created, you have a few different options for inserting your logo into Microsoft Word. First, you can drag and drop the file directly into the header space.
Second, from the top menu you can click Insert > Photo > Picture from File…
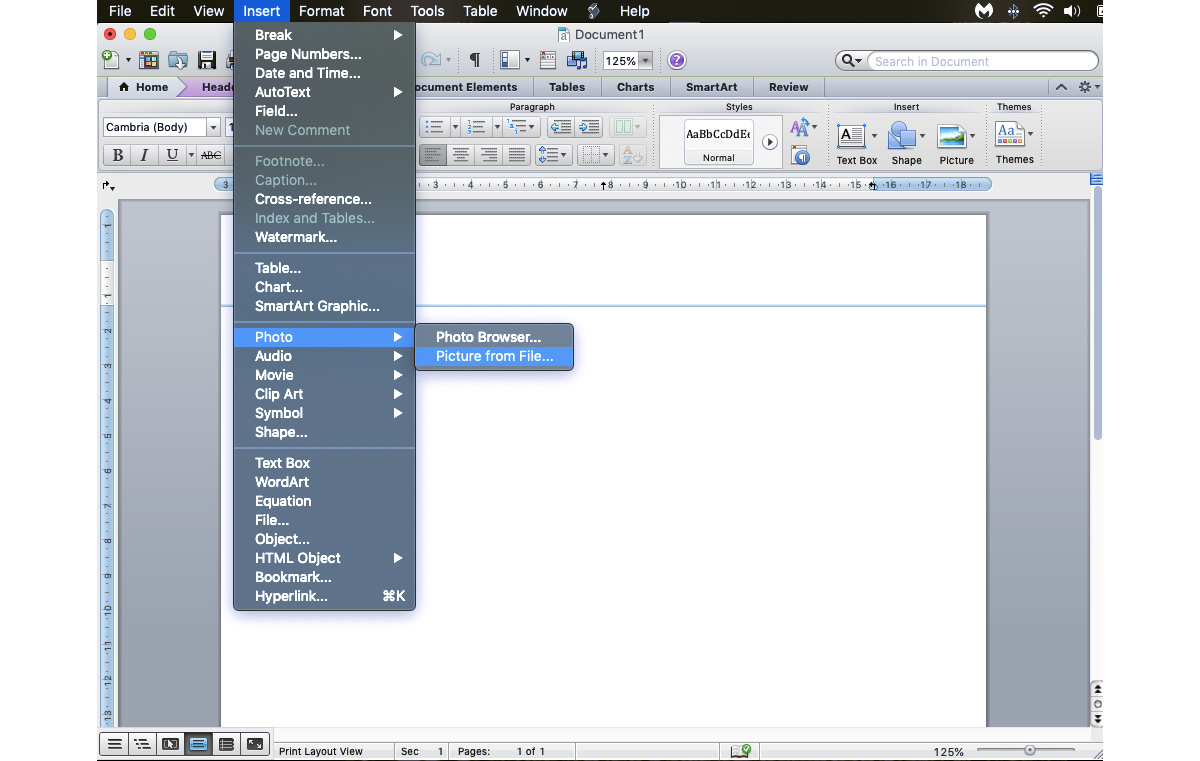
Either way is fine; the end result is the same. Once the logo file is in your header, you can customize it however you want.
- to change the size, drag the corners of the image
- to change the alignment, click the same icons you use for formating text

Review the options panel for Headers at the top to make sure your letterhead is the way you want. You have options for alternating headers on odd and and even pages, using a different header on the first page, or automatically including the proper date and time in your heading.
Don’t forget to add any text you want to include!

When you’re ready, simply save the document. Your new branded letterhead is ready to go!
How to Insert Your Logo in Microsoft Word Text for Flyers, Posters, Etc.
What if you don’t need a letterhead, but want to know how to put a logo in MS Word body text? What if you’re creating a flyer, poster, pamphlet, or other promotional document and want your logo to appear side-by-side with other text?
You can insert your logo into MS Word body text the same ways you can insert a logo into your header: drag-and-drop or clicking Insert > Photo > Picture from File… If you choose the second method, your logo will appear wherever your cursor is in the document, so click where you want the logo to go before inserting it.
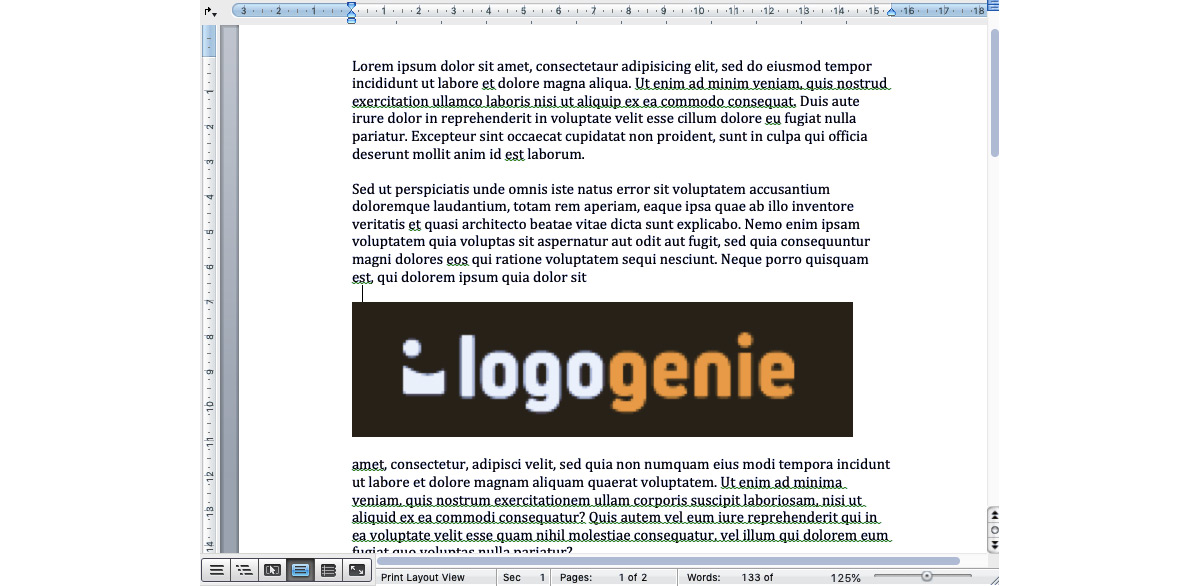
Again, you can customize it the way you want. Click and drag the corners to resize it, or click and drag the center of the image to move it to a new location.
The options for Format Picture have additional options as well. You can “wrap” the text around your image so that it’s part of the content, or keep it sectioned off. You can even make th logo transparent and set it as the background, with the text on top. It’s up you!

How to Replace Images in Microsoft Word Templates with Your Logo
MS Word comes with lots of free templates to use for anything from business cards to informational brochures. These templates all come preloaded with their own images and placeholder text, but what if you want to replace one of those images with your own logo?
First, just click on the picture you want to change so that it’s highlighted. From here you can delete the picture and upload your logo manually (using one of the two methods above). However, there’s a more efficient method.
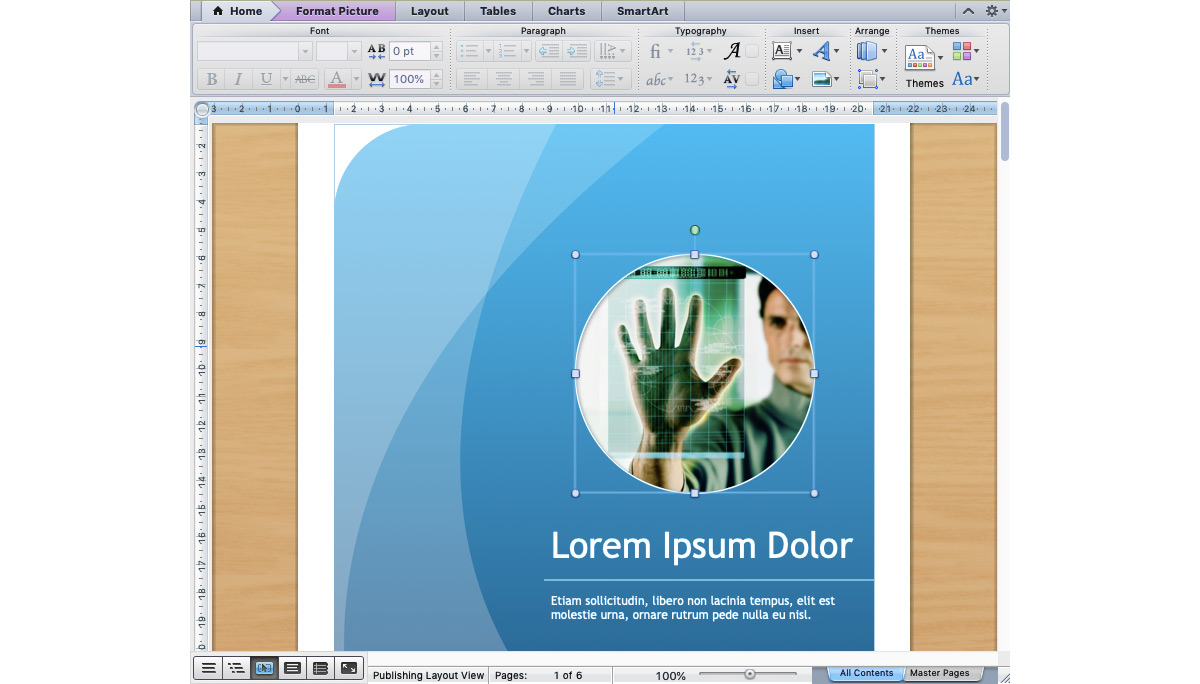
With the picture highlighted, right click and choose Change Picture. Simply select the image file of your logo and MS Word will automatically swap out the two pictures.
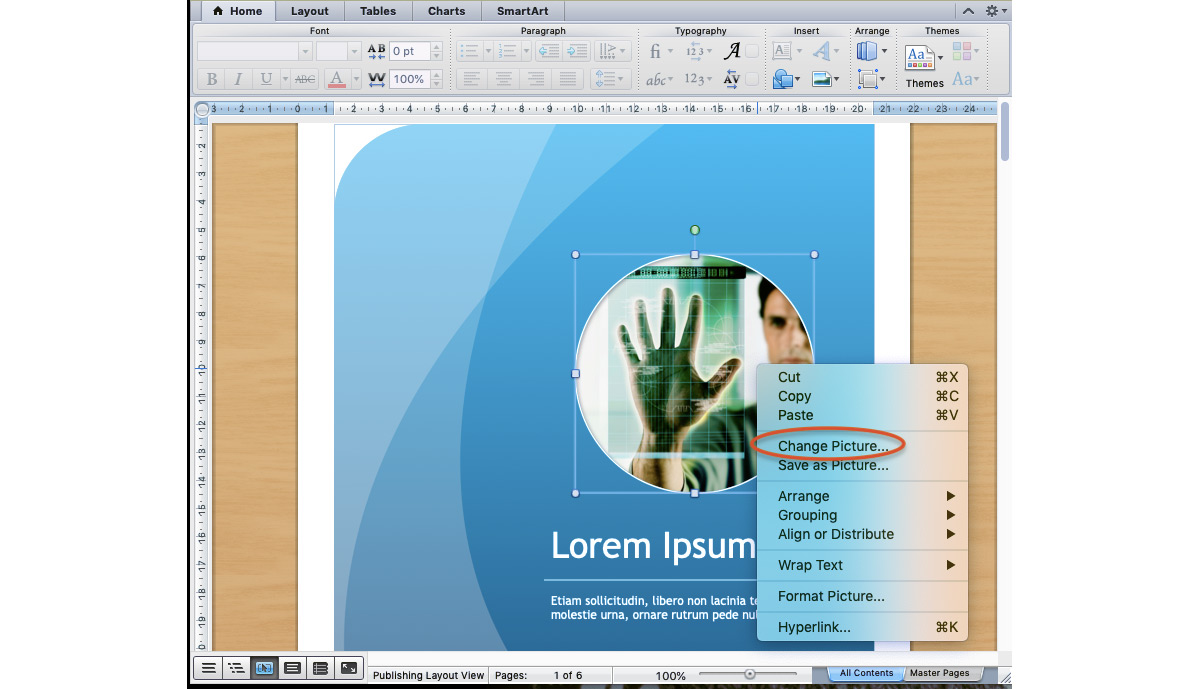
The best part is, MS Word will automatically format your picture to look like the template version it replaced. In our example here, MS Word automatically applied the oval shape and circular border to our logo without us having to do anything.

How to Design Your Own Logo
If you don’t have spare cash in your budget to hire a logo designer, don’t despair. While in the past you may have had limited options, nowadays technology has advanced so that virtually anyone can design their own logo using an online logo design tool like logogenie.
In our digital era, design software is less about the technical skill of your hands and more about your creative ideas. You don’t need to master your brush strokes or pencil shading — you don’t even need steady hands. With digital logo makers, all you need is an idea.
Logogenie, and other online design tools, use templates to make design fast and easy, even for first timers. First, you select your industry from the dropdown menu.
We’ve categorized our templates by the needs and demands of the top industries, so finding yours is the first step. Our algorithm will then generate the top choices for your industry.
Simply choose the one you like and start editing. You can customize each template however you want, personalizing your choices for:
- Main images
- Company name and slogan
- Font and typography
- Color schemes
- Text and picture sizes
- Text and picture placement
- Adding new icons
- Layering (putting some images behind or in front of others)
You can choose from our internal library of over 200 icons. A quick glance shows that there are plenty of the intellectual imagery we mentioned above, including trees with rainbow leaves, shield crests, books, graduation caps, and more.
If you want to use more advanced techniques, we wrote a quick beginner’s guide to using Logogenie. This explains all the nuances of the Logogenie interface, including how to edit individual aspects of the base image, change certain colors but not other, and perfecting your typography.
Using a DIY logo maker like logogenie, you can create a professional-tier logo in just minutes. When you’re done, you can buy all permissions and commercial licensing for $24.90, which grants you your logo forever.
While the template-style of design works well for first-timers, you’ll get better results if you bone up on some graphic design basics beforehand. Keep reading our blog for special design tips, straight from expert designers.


